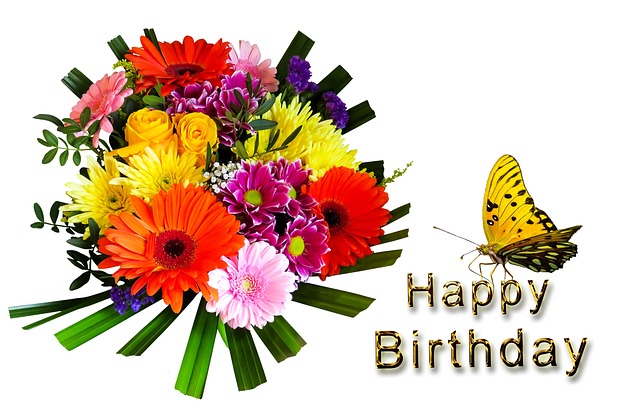
There’s nothing quite as thoughtful as a handmade DIY birthday card to celebrate someone’s special day. A personalized card not only adds a personal touch to your birthday message but also shows that you’ve put time and effort into making something unique.
Whether you’re looking for a simple design or a more intricate card with fun details, creating a DIY birthday card allows you to customize it perfectly for the recipient.
In this guide, we’ll explore 12 creative DIY birthday card ideas that are easy to make and perfect for any celebration.
From pop-up designs to hand-lettering and interactive elements, these cards will help you add a creative flair to your handmade birthday gifts.
1. Pop-Up Cake Birthday Card
A pop-up birthday cake card is a fun, interactive way to surprise the recipient when they open their card. It’s simple to make but has a big visual impact.
Materials Needed:
- Cardstock (for the base)
- Colored paper or patterned paper
- Scissors and glue
- Markers or stickers for decoration
Step-by-Step Guide:
- Create the Card Base: Fold a piece of cardstock in half to form the base of the card.
- Make the Cake: Cut out three rectangles of different sizes from colored paper to represent the layers of the cake. Fold each one in half and glue them inside the card so they pop up when opened.
- Decorate: Add details like candles, frosting, or sprinkles with markers, stickers, or cut-out paper shapes.
Expert Tip: Card-making expert Jennifer McGuire suggests using double-sided tape for a clean, seamless look when attaching the pop-up elements (source).
2. Watercolor Wash Birthday Card
For a soft and artistic touch, create a watercolor wash birthday card. This design is simple but beautiful, perfect for those who love handmade, artsy cards.
Materials Needed:
- Watercolor paper or blank cardstock
- Watercolor paints and brushes
- Black pen or brush marker (for lettering)
Step-by-Step Guide:
- Paint the Background: Using watercolor paints, create a soft wash of colors across the front of your card. You can blend colors or keep it monochromatic for a minimal look.
- Let It Dry: Allow the paint to dry completely before adding details.
- Lettering: Once the paint is dry, use a black pen or brush marker to hand-letter a simple message like “Happy Birthday” across the watercolor background.
Expert Tip: Artist Kristina Werner recommends using painter’s tape around the edges of the card to create clean borders for the watercolor wash (source).
3. Button Balloon Birthday Card
Add a whimsical touch to your card with button balloons! This DIY birthday card idea is easy to make and great for kids or adults alike.
Materials Needed:
- Blank cardstock
- Colorful buttons (different sizes)
- Thin string or embroidery floss
- Glue
Step-by-Step Guide:
- Arrange the Buttons: Arrange colorful buttons on the front of the card to represent balloons.
- Attach the Buttons: Glue the buttons onto the card securely.
- Add Strings: Use thin string or embroidery floss to draw or glue the “balloon strings” coming from the buttons down to the base of the card.
Expert Tip: Craft blogger Lia Griffith suggests adding a ribbon or bow where the balloon strings meet for extra detail (source).
4. Photo Collage Birthday Card
Make your birthday card more personal by creating a photo collage that features fun memories with the birthday person. This card is both sentimental and thoughtful.
Materials Needed:
- Blank cardstock
- Printed photos (small sizes)
- Scissors and glue
- Stickers or embellishments
Step-by-Step Guide:
- Print and Cut Photos: Print out small versions of your favorite photos with the birthday person.
- Arrange the Photos: Arrange the photos in a collage style on the front of the card, overlapping them slightly for a creative look.
- Decorate: Add stickers, embellishments, or captions to each photo for added meaning.
Expert Tip: Photography expert Rachel Brenke recommends printing photos with a matte finish to avoid glare and make the collage look more cohesive (source).
5. Confetti Shaker Card
For a celebratory touch, create a confetti shaker card that’s perfect for birthdays. When shaken, the card will show off a fun, interactive confetti effect.
Materials Needed:
- Clear plastic or acetate sheet
- Cardstock (for the base)
- Confetti or small sequins
- Double-sided foam tape
Step-by-Step Guide:
- Create a Window: Cut a window in the front of your card, and attach a clear plastic sheet to the back of it.
- Add Foam Tape: Use foam tape around the edges of the window to create a pocket.
- Fill with Confetti: Fill the pocket with confetti or sequins before sealing it with another piece of cardstock.
Expert Tip: Shaker card expert Jennifer McGuire suggests using anti-static powder inside the window to prevent confetti from sticking to the plastic (source).
6. Hand-Lettered Birthday Card
If you love hand-lettering, this DIY birthday card idea is perfect for showcasing your skills. A beautifully lettered card adds a personal and artistic touch.
Materials Needed:
- Blank cardstock
- Brush pens or calligraphy markers
- Pencil (for sketching)
Step-by-Step Guide:
- Sketch Your Design: Lightly sketch your lettering design on the card using a pencil. You can write something simple like “Happy Birthday” or include a longer message.
- Lettering: Trace over your pencil sketch with brush pens or calligraphy markers, adding flourishes or decorative elements.
- Add Finishing Touches: Add small illustrations like stars, hearts, or balloons around the lettering to complete the design.
Expert Opinion: Calligraphy artist Lindsey Bugbee suggests practicing on scrap paper before applying your design to the final card for the best results (source).
7. DIY Scratch-Off Birthday Card
Add an interactive element to your card with a scratch-off birthday card! The recipient can scratch off parts of the card to reveal hidden messages or surprises.
Materials Needed:
- Blank cardstock
- Clear packing tape or laminating sheets
- Acrylic paint (metallic or silver)
- Dish soap
- Paintbrush
Step-by-Step Guide:
- Write the Messages: Write or print secret birthday messages on the card.
- Cover with Tape: Place clear tape or a laminating sheet over the area where the message is.
- Create the Scratch-Off Paint: Mix acrylic paint with a few drops of dish soap and paint over the taped area.
- Let It Dry: Once dry, the recipient can scratch off the paint to reveal the hidden message.
Expert Tip: DIY blogger Amber Kemp-Gerstel recommends using metallic paint for a fun, lottery-ticket look (source).
8. Paper Quilling Birthday Card
For a more intricate and decorative touch, try paper quilling to create beautiful designs on your birthday card. This technique involves rolling strips of paper into shapes to form patterns or images.
Materials Needed:
- Paper quilling strips (or cut your own from colored paper)
- Quilling tool or toothpick
- Glue
- Blank cardstock
Step-by-Step Guide:
- Roll the Paper Strips: Use a quilling tool or toothpick to roll paper strips into coils. You can pinch or shape them into different forms like flowers, hearts, or leaves.
- Arrange the Design: Arrange the quilled shapes on the front of your card in the design of your choice.
- Glue the Pieces: Glue the quilled pieces onto the card and let them dry.
Expert Opinion: Quilling artist Ann Martin suggests starting with simple shapes like flowers or balloons before moving on to more complex designs (source).
9. Pop-Up Gift Card Holder
Combine your card with a gift by creating a pop-up gift card holder! This interactive card includes a pop-up feature that holds a gift card inside.
Materials Needed:
- Cardstock (for the base)
- Scissors
- Glue or double-sided tape
- Gift card
Step-by-Step Guide:
- Create the Base: Fold a piece of cardstock in half to form the card base.
- Make the Gift Card Slot: Cut a slit in the middle of the card for the gift card. You can create a pop-up mechanism by cutting two slits parallel to each other and folding the strip in the middle.
- Insert the Gift Card: Slide the gift card into the slot, so it pops up when the card is opened.
Expert Tip: Gift-wrapping expert Lia Griffith recommends decorating the inside of the card with washi tape or stickers to make the gift card slot look more polished (source).
10. Pressed Flower Birthday Card
A pressed flower birthday card is a beautiful way to incorporate nature into your design. This card feels elegant and thoughtful, perfect for someone who appreciates the beauty of flowers.
Materials Needed:
- Pressed flowers (store-bought or homemade)
- Blank cardstock
- Clear glue or mod podge
Step-by-Step Guide:
- Arrange the Flowers: Carefully arrange pressed flowers on the front of your card.
- Glue the Flowers: Use a small amount of clear glue or mod podge to attach the flowers to the card, making sure to press them down gently.
- Let It Dry: Allow the glue to dry completely before writing your message inside the card.
Expert Tip: Floral designer Emily Thompson recommends choosing flat, lightweight flowers like daisies or pansies for the best results (source).
11. Embroidered Birthday Card
Add texture and craftsmanship to your card by incorporating embroidery. This technique allows you to stitch designs or messages directly onto the card for a unique, handmade look.
Materials Needed:
- Blank cardstock
- Embroidery needle and thread
- Pencil (for sketching)
Step-by-Step Guide:
- Sketch Your Design: Lightly sketch your design or message on the card with a pencil.
- Poke Holes: Use a needle to poke small holes along the lines of your design.
- Stitch the Design: Thread the needle with embroidery thread and stitch along the holes to create your design.
Expert Opinion: Sewing expert Tilly Walnes suggests starting with simple shapes or words before trying more intricate designs to get the hang of stitching on paper (source).
12. Washi Tape Birthday Card
Washi tape is a fun and easy way to add color and pattern to your DIY birthday card. With so many washi tape designs available, you can create endless combinations.
Materials Needed:
- Blank cardstock
- Washi tape (in various colors and patterns)
- Scissors
Step-by-Step Guide:
- Create the Design: Use washi tape to create patterns, shapes, or stripes on the front of the card.
- Trim the Edges: Trim any excess tape that hangs off the edges of the card.
- Finish with a Message: Write a birthday message inside or use stickers to add a greeting to the front of the card.
Expert Tip: Good Housekeeping suggests layering different widths and patterns of washi tape to create a more dynamic and interesting design (source).
Conclusion
These 12 creative DIY birthday card ideas offer a range of designs, from simple to intricate, that are sure to impress the recipient. Whether you’re adding personal photos, using hand-lettering techniques, or incorporating fun pop-up elements, your handmade card will make any birthday celebration even more special.
FAQs
1. What materials do I need for DIY birthday cards?
Common materials include cardstock, markers, glue, scissors, and decorative items like stickers, buttons, or washi tape. Depending on the design, you may also need items like yarn, watercolor paints, or pressed flowers.
2. How long does it take to make a DIY birthday card?
Simple DIY birthday cards can take as little as 10–20 minutes, while more intricate designs like pop-up cards or embroidered cards may take an hour or more.
3. Can kids help with making DIY birthday cards?
Absolutely! Many DIY card designs, like button balloons or washi tape cards, are perfect for kids to help with and customize.
4. Can I make DIY birthday cards using recycled materials?
Yes! Recycled materials like old magazines, gift wrap, or scraps of fabric can add a unique, eco-friendly touch to your DIY birthday cards.
5. How can I make my DIY birthday cards look professional?
Using high-quality cardstock, clean lines, and professional techniques like hand-lettering or embossing can give your DIY birthday card a polished, professional look.
Read Also: 13 Thoughtful DIY Christmas Presents for Mom She’ll Cherish Forever

