Introduction
Halloween is the time to unleash your creativity and transform your home into a spooky haunted space. One of the most effective ways to create a spine-chilling atmosphere is by incorporating DIY Halloween decoration scars into your setup.
These eerie details can make your decorations look straight out of a horror movie, adding a gruesome, realistic touch that will surely spook your guests.
From gory walls to creepy accessories, this guide will show you how to make 12 DIY Halloween decoration scar that will take your haunted house to the next level.
Let’s dive into these frightful hacks that are easy to craft and guaranteed to give your guests nightmares!
1. Realistic Scar Wall Decorations
If you want to make your walls look like they’ve been slashed by a monster, these scar wall decorations are perfect for your DIY Halloween setup.
Materials Needed:
- Red liquid latex
- Tissue paper
- Fake blood
- Adhesive or glue
- Paintbrushes
Step-by-Step Guide:
- Prepare the Base: Apply a thin layer of liquid latex to the wall in the shape of a gash or scar.
- Add Texture: Tear small pieces of tissue paper and press them into the latex while it’s still wet. Add more latex on top to seal the paper.
- Detailing: Once it’s dry, use dark red and black paint to shade the wound, making it look deep. Finish with fake blood for a fresh, gruesome effect.
Expert Tip: Special Effects Artist Dan Wilson advises using a mix of dark reds and purples to add depth to the scars, making them look more realistic.
2. Bloody Scar Tablecloth
Spook your dinner guests with a scarred tablecloth that looks like it’s been through a horror movie massacre.
Materials Needed:
- White tablecloth
- Red fabric paint or fake blood
- Scissors
- Black and brown paint (optional)
Step-by-Step Guide:
- Create the Tears: Cut jagged slashes into the tablecloth with scissors to mimic rips and scars.
- Add the Blood: Dab red fabric paint or fake blood around the slashes to create the appearance of fresh wounds.
- Distress the Cloth: For a more authentic look, smear black or brown paint around the edges of the cuts to give the cloth a worn, aged feel.
Expert Tip: Interior Designer Claire Mason suggests distressing the entire tablecloth with coffee stains to give it an old, creepy vibe before adding the blood effects.
3. Scar-Themed Window Clings. 
Nothing will spook your neighbors quite like scar-themed window clings that make it look like something terrible happened inside your house.
Materials Needed:
- Gel cling sheets (available at craft stores)
- Red food coloring
- Clear hair gel
- Plastic wrap
- Sharpie markers (optional)
Step-by-Step Guide:
- Create the Scar Pattern: Mix a bit of red food coloring with clear hair gel and smear it onto the gel cling sheets in the shape of scars or gashes.
- Add Depth: Use a Sharpie to draw deep, jagged edges around the gel to make the scars look more severe.
- Apply to Windows: Press the gel clings onto your windows and smooth them out, making sure the scars look realistic from the outside.
Expert Tip: Event Decorator Megan Reed recommends layering different shades of red and black in the gel mixture to make the scars look more dimensional.
4. Scarred Door Wreath
Welcome your guests in style with a scarred door wreath that screams horror before they even step inside.
Materials Needed:
- Basic black Halloween wreath
- Fake skin or latex (available at costume shops)
- Red and black paint
- Fake blood
Step-by-Step Guide:
- Prepare the Wreath: Start with a plain black wreath, which will act as the background.
- Make the Scars: Mold the fake skin or latex into strips that look like torn flesh. Attach these to the wreath using glue.
- Add the Gore: Use red and black paint to detail the scars, and finish with fake blood to make the “flesh” look freshly ripped.
Expert Tip: According to Halloween Decor Specialist Lily Roberts, “Adding small bone or skull elements to the wreath can enhance the gruesome effect and make it even more terrifying.”
5. DIY Scar Candle Holders
Create scar candle holders that give off a sinister vibe, perfect for dim lighting during your Halloween party.
Materials Needed: 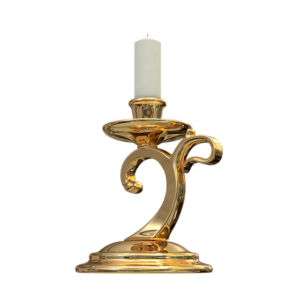
- Plain glass candle holders
- Red wax or liquid latex
- Black and red paint
- Candles
Step-by-Step Guide:
- Design the Scars: Use red wax or latex to create scar-like patterns on the outside of the candle holders.
- Paint for Effect: Once the scars have dried, paint around the edges with black and red to give the wounds a deep, unsettling appearance.
- Finish with Candles: Place candles inside the holders, and as they burn, the light will flicker through the scar patterns for a creepy glow.
Expert Tip: Candlemaker Johnathan Steel suggests using LED candles to prevent the wax from melting your scar designs, preserving your creation for the entire night.
6. Bloody Handprint Scar Art
This diy halloween decoration scar hack combines bloody handprints with scar effects to create horrifying wall art.
Materials Needed:
- Canvas or poster board
- Red and black paint
- Fake blood
- Rubber gloves
Step-by-Step Guide:
- Bloody Handprints: Dip rubber-gloved hands into red paint or fake blood and press them onto the canvas to leave bloody handprints.
- Add Scars: Use black and red paint to create scar patterns around the handprints, making it look like the hands were clawing at the canvas.
- Detailing: Drip fake blood around the edges to enhance the gruesome look.
Expert Tip: Artist James Kellar advises using thick, textured paint to create the scars for a 3D effect that makes the artwork pop off the wall.
7. Scar Wall Hanging
Transform your regular Halloween decorations by adding scarred wall hangings that look like parts of a victim’s flesh.
Materials Needed:
- Burlap or canvas fabric
- Red and black paint
- Fake skin or liquid latex
- Twine
Step-by-Step Guide:
- Prepare the Fabric: Cut the burlap into strips or squares, and soak them in coffee to give them an old, weathered look.
- Create the Scars: Use latex or fake skin to create raised scar patterns on the fabric. Paint the scars with red and black to make them stand out.
- Hang with Twine: Attach the fabric pieces to twine and hang them on the wall for a disturbing, flesh-like appearance.
Expert Tip: Event Stylist Maria Thompson suggests adding torn edges to the fabric for a more “skin-like” effect, making it seem as though the fabric was ripped off someone’s body.
8. Scar-Themed Table Centerpiece
Create a grotesque scar-themed centerpiece for your Halloween table that looks like a horrifying surgical experiment.
Materials Needed:
- Plastic mannequin arm or leg (available at craft stores)
- Red liquid latex or wax
- Black and red paint
- Surgical tools or toy knives
Step-by-Step Guide:
- Prepare the Limb: Use a plastic mannequin limb as the base for your centerpiece.
- Add the Scars: Use red wax or liquid latex to create long scars along the limb, painting the edges with black and red for added detail.
- Accessorize: Surround the limb with fake surgical tools or knives, and add fake blood for extra horror.
Expert Tip: Special Effects Makeup Artist Jack Morgan suggests using silicone-based materials for a more realistic, flexible scar look that can bend with the plastic limb.
9. Scarred Mirror Frame
Turn a simple mirror into a haunted, scarred decoration with this DIY Halloween scar hack.
Materials Needed:
- Plain mirror
- Red wax or liquid latex
- Black and red paint
- Fake blood
Step-by-Step Guide:
- Prepare the Frame: If the mirror has a frame, clean and paint it black for a spooky look.
- Create Scars: Apply red wax or liquid latex around the edges of the mirror and frame, shaping it to resemble torn flesh or scratches.
- Detailing: Paint the scars with black and red, then add fake blood dripping down for an extra chilling effect.
Expert Tip: According to Interior Designer Alex Walsh, “Adding a foggy film to the mirror will enhance the haunted look, making the scars seem even more sinister.”
10. Scar-Themed Serving Trays
Add some spooky flair to your Halloween snack table with scarred serving trays.
Materials Needed:
- Plain metal or plastic serving trays
- Red and black paint
- Fake blood
- Hot glue
Step-by-Step Guide:
- Create Scars with Glue: Use hot glue to create raised scar patterns on the trays. Let it dry completely before painting.
- Paint the Scars: Paint the scar patterns with red and black paint, adding fake blood for a fresh, bloody effect.
- Serve the Horror: Use the trays to serve Halloween-themed snacks, adding a touch of horror to your food presentation.
Expert Tip: Chef Peter Dawson recommends keeping the trays slightly rough to add texture, making them look like old surgical equipment.
11. Scar Pillows for Extra Creepy Comfort
For a subtle yet creepy touch, create scar-themed pillows to decorate your seating areas.
Materials Needed:
- Plain white or black pillowcases
- Red fabric paint
- Black fabric paint
- Needle and thread (optional)
Step-by-Step Guide:
- Design the Scars: Use red fabric paint to draw large gashes or scars across the pillows. Add black shading around the edges for depth.
- Optional Stitching: For an extra touch of realism, use a needle and thread to create “stitches” across the scar marks.
- Distress the Fabric: Rub some fabric paint on the edges of the pillows to give them a worn, dirty look.
Expert Tip: Home Decor Specialist Nora James suggests using small rips in the fabric to create the illusion that the scars are tearing the pillow open.
12. Scarred Door Curtains
Spook anyone who enters your home by creating scar-themed door curtains that look like a bloody mess.
Materials Needed:
- Black or red curtains
- Red and black fabric paint
- Scissors
- Fake blood
Step-by-Step Guide:
- Create the Tears: Cut jagged slashes into the curtains to mimic scars.
- Paint the Scars: Use red and black fabric paint to enhance the look of torn flesh along the edges of the slashes.
- Finish with Blood: Drip fake blood along the cuts and scars for a gruesome, fresh-blood look.
Expert Tip: Event Decorator Sophie Lang suggests adding some spider webs or hanging bats around the curtains to enhance the creepy vibe.
Conclusion
These 12 DIY Halloween decoration scar hacks are sure to add a terrifying twist to your haunted house setup.
With a few basic materials and a little creativity, you can create spine-chilling decorations that will have your guests running for the door.
Whether you’re designing a scarred wall or a gruesome centerpiece, these ideas will help you set the perfect scary scene this Halloween.
FAQs On Diy Halloween Decoration Scar.
1. How do you make fake scars for Halloween decorations?
Fake scars can be made using red liquid latex, tissue paper, and fake blood to create a 3D effect.
2. Can I use regular paint for scar decorations?
Yes, but fabric paint or latex-based paints work better for flexible surfaces like curtains or pillows.
3. How do I make scarred walls look realistic?
Use liquid latex and tissue paper to build up layers for a realistic scar texture, then detail with paint and fake blood.
4. Can I reuse these scar decorations?
Most scar decorations, especially those made with fabric or wax, can be reused with proper storage.
5. How can I make scar decorations look more gruesome?
Adding depth with dark shading and dripping fake blood gives scars a more realistic and terrifying appearance

