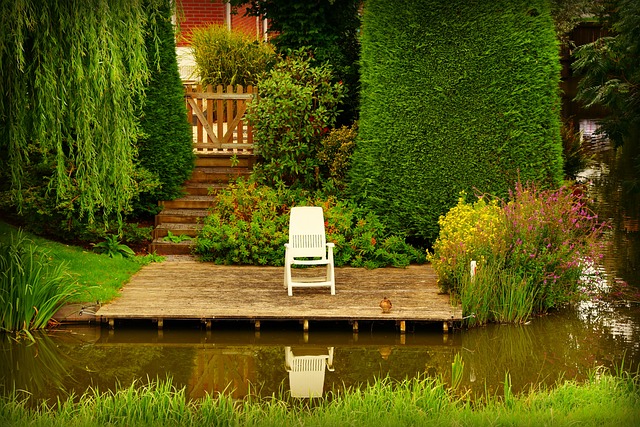
Introduction: DIY Outdoor Living.
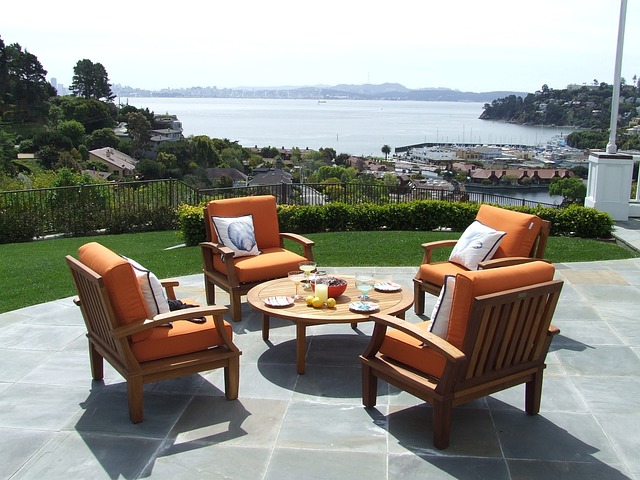
Creating an inviting outdoor living space doesn’t have to be expensive or difficult. With the right DIY outdoor living projects, you can transform your backyard, patio, or garden into a personal retreat, perfect for entertaining, relaxing, or enjoying nature.
Whether you have a large yard or a cozy balcony, these 10 DIY projects will help you make the most of your outdoor space, all while staying on a budget.
In this guide, we’ll explore 10 DIY outdoor living projects that range from building furniture to adding stylish decor, all guaranteed to elevate your outdoor space.
We will include expert tips to make sure your projects are not only beautiful but also functional and durable.
1. DIY Outdoor Fire Pit: Cozy Gathering Spot
A fire pit is a fantastic focal point for any outdoor living area, perfect for gathering with family and friends, roasting marshmallows, or simply enjoying the warmth on cool evenings.
This project is simple to make with minimal materials, but it adds an instant cozy atmosphere to your backyard.
Materials Needed:
- Paving stones or bricks
- Gravel
- Shovel
- Fire-resistant adhesive
Step-by-Step Guide:
- Choose a Location: Find a safe, flat area for your fire pit, away from structures or low-hanging branches.
- Create a Base: Dig a shallow hole and fill it with gravel to help with drainage.
- Build the Pit: Arrange the paving stones or bricks in a circle and secure them with fire-resistant adhesive. Stack them 2-3 layers high, depending on your preference.
- Finish the Look: Fill the center with more gravel or sand, and you’re ready to light your fire!
Expert Tip: According to landscape designer Sara Bendrick, “A fire pit adds not only warmth but also a natural gathering space. Make sure to use non-combustible materials and check local fire regulations before building.”
2. Pallet Outdoor Furniture: Budget-Friendly Seating
If you’re looking to create affordable, stylish outdoor furniture, pallets are a fantastic material. They are inexpensive, easy to find, and can be transformed into sofas, tables, or loungers.
Materials Needed:
- Wooden pallets (4-6 for a sofa)
- Sandpaper
- Cushions or outdoor pillows
- Paint or wood stain
Step-by-Step Guide:
- Sand the Pallets: Sand down any rough edges to avoid splinters.
- Assemble the Furniture: Stack two pallets for the seat and use additional pallets for the backrest. Secure them together with screws.
- Customize: Paint or stain the pallets to match your outdoor decor. Add cushions or pillows for comfort and style.
Expert Opinion: DIY Network suggests, “Pallet furniture is one of the easiest ways to create durable and functional seating for outdoor spaces without spending a lot of money.”
3. DIY Pergola: Shade and Style
A pergola not only adds architectural interest to your outdoor space but also provides shade, making it a practical addition for sunny areas. Building your own pergola can be more cost-effective than buying a pre-made kit and gives you the flexibility to design it to fit your space.
Materials Needed:
- Pressure-treated wood (posts, beams, and rafters)
- Screws and brackets
- Concrete for securing posts
- Saw and drill
Step-by-Step Guide:
- Measure and Mark: Decide where you want your pergola and measure out the area. Mark where the posts will go.
- Set the Posts: Dig holes and set the wooden posts in concrete for stability.
- Add Beams and Rafters: Attach horizontal beams and rafters using screws and brackets. Space them evenly for a balanced look.
- Finish and Decorate: Paint or stain the wood, and consider adding climbing plants or outdoor lights for a beautiful touch.
Expert Opinion: HGTV highlights, “A pergola is a great way to add both shade and style to an outdoor living area. It can also serve as a structure for hanging lights, plants, or outdoor curtains for privacy.”
4. Vertical Garden: Add Greenery in Small Spaces
A vertical garden is perfect for those with limited space or anyone who wants to add more greenery to their outdoor living area. This DIY project allows you to grow herbs, flowers, or even small vegetables while saving ground space.
Materials Needed:
- Wooden pallets or a trellis
- Planter pots or fabric planting pockets
- Potting soil
- Plants of your choice
- Hooks or screws
Step-by-Step Guide:
- Prepare the Frame: Use a wooden pallet or trellis as the base for your vertical garden. Attach it to a wall or fence securely.
- Add Planters: Use hooks or screws to attach small planter pots or fabric planting pockets to the pallet or trellis.
- Plant Your Garden: Fill the planters with soil and add your favorite herbs, flowers, or succulents.
Expert Tip: According to gardening expert Joe Lamp’l, “Vertical gardens are perfect for maximizing space in smaller yards or patios. Choose lightweight planters and make sure the frame is sturdy enough to support the plants.”
5. Outdoor Bar Cart: Entertaining Essential
An outdoor bar cart is a practical addition to any DIY outdoor living space, making it easy to serve drinks and snacks during gatherings. This project can be completed with basic carpentry skills and gives your patio a polished, entertaining-friendly look.
Materials Needed:
- Wooden boards or an old cart
- Screws or nails
- Casters (wheels)
- Paint or wood stain
- Outdoor tray for holding drinks
Step-by-Step Guide:
- Build the Frame: Use wooden boards to create a simple frame with two or three shelves.
- Add Wheels: Attach casters to the bottom for easy mobility.
- Paint and Finish: Paint or stain the wood to protect it from the elements. Add a top tray for drinks and a lower shelf for storage.
Expert Opinion: Entertaining expert Camille Styles says, “An outdoor bar cart is a must-have for summer parties, and a DIY version lets you customize the size and style to match your space.”
6. DIY Outdoor Movie Screen: Backyard Cinema
Create a cozy outdoor cinema with a DIY movie screen that’s perfect for hosting movie nights under the stars. This project is easy to make and can be set up quickly for impromptu gatherings.
Materials Needed:
- PVC pipes (for the frame)
- White canvas or blackout fabric (for the screen)
- Bungee cords or strong clips
- Projector
Step-by-Step Guide:
- Build the Frame: Assemble the PVC pipes to create a rectangular frame that will support the fabric.
- Attach the Screen: Stretch the white canvas or blackout fabric over the frame and secure it with bungee cords or clips.
- Set Up the Projector: Place the screen in your yard or patio, set up a projector, and enjoy your outdoor movie night!
Expert Opinion: Tech Blogger David Carnoy of CNET notes, “Outdoor movie screens are easy to DIY, and using blackout fabric ensures a crisp, clear projection.”
7. DIY Outdoor Kitchen: A Chef’s Dream
Turn your backyard into a functional cooking space with a DIY outdoor kitchen. Whether it’s a simple grill station or a full-blown cooking area, having an outdoor kitchen makes entertaining even more enjoyable.
Materials Needed:
- Countertop material (like concrete or wood)
- Stainless steel sink (optional)
- Grill or outdoor oven
- Storage shelves
Step-by-Step Guide:
- Build the Countertop: Create a sturdy base for your countertop using concrete blocks or wooden beams. Add a countertop surface.
- Install the Grill: Place your grill or outdoor oven in the center of the counter, leaving space for food prep on either side.
- Add Shelving: Install storage shelves underneath the counter for utensils, dishes, or cooking supplies.
Expert Tip: According to Chef Mark Bittman, “A well-designed outdoor kitchen doesn’t have to be expensive. Focus on a functional layout that includes enough prep space and easy access to your grill or stove.”
8. DIY Outdoor Lighting: Ambiance on a Budget
Good lighting can completely transform your outdoor living space, creating a magical ambiance for evening gatherings. With some simple DIY lighting solutions, you can add warmth and charm to your patio or garden.
Materials Needed:
- String lights or fairy lights
- Mason jars or glass lanterns
- Candles or LED lights
- Hooks or nails for hanging
Step-by-Step Guide:
- Hang String Lights: Use string lights to outline a pergola, fence, or patio roof for soft, ambient lighting.
- Create Lanterns: Fill mason jars with LED candles or fairy lights and hang them from trees or place them on tables for a cozy glow.
- Add Pathway Lights: Line garden paths or walkways with solar-powered lights for both style and safety.
Expert Opinion: Lighting designer Rebecca Robeson says, “Outdoor lighting is essential for creating a welcoming atmosphere. Use a mix of overhead lights, lanterns, and ground lighting for a layered effect.”
9. DIY Water Feature: Relaxing Backyard Oasis
A water feature adds a peaceful, tranquil element to any outdoor space. You can create a small fountain or pond with simple materials, bringing the soothing sound of running water to your backyard.
Materials Needed:
- Waterproof container or basin
- Small water pump
- Rocks or pebbles
- Water plants (optional)
Step-by-Step Guide:
- Choose a Container: Use a large waterproof pot or basin as the base for your water feature.
- Install the Pump: Place the small water pump in the center of the basin and hide it with rocks or pebbles.
- Add Water and Plants: Fill the container with water and add aquatic plants or floating decorations for a natural look.
Expert Tip: Landscape architect Jay Sifford says, “Water features don’t have to be elaborate. Even a small fountain can bring a sense of calm and tranquility to your outdoor space.”
10. DIY Outdoor Rugs: Style Underfoot
An outdoor rug ties your outdoor living area together, adding color, texture, and comfort to your patio or deck. Making your own outdoor rug can be a fun and easy project.
Materials Needed:
- Drop cloth or outdoor fabric
- Fabric paint or outdoor acrylic paint
- Painter’s tape (for stencils)
- Outdoor sealant
Step-by-Step Guide:
- Prepare the Fabric: Cut the drop cloth or outdoor fabric to the size you want for your rug.
- Create a Design: Use painter’s tape to create patterns or stencils, then paint the design using fabric or outdoor acrylic paint.
- Seal the Rug: Once the paint is dry, apply a coat of outdoor sealant to protect your rug from the elements.
Expert Tip: DIY Decor Blogger Emily Henderson suggests, “Choose bold colors and patterns that complement your outdoor furniture, and be sure to use a sealant for durability.”
Conclusion
Transforming your outdoor space into a beautiful, functional living area is possible with these DIY outdoor living projects. From cozy fire pits to relaxing water features, each project offers a unique way to enhance your backyard, patio, or garden. By taking on these DIY projects, you can customize your outdoor space to fit your style and budget while creating an inviting atmosphere for entertaining and relaxation.
Frequently Asked Questions.
1. What is DIY Outdoor living?
DIY outdoor living refers to creating and improving outdoor spaces—like patios, decks, and gardens—through do-it-yourself projects.
2. What are some easy DIY outdoor living projects?
Some easy projects include building pallet furniture, creating a vertical garden, or hanging string lights for ambiance.
3. How can I make my outdoor space more comfortable?
Add comfortable seating, outdoor rugs, lighting, and even an outdoor kitchen or bar cart to make your space more functional and cozy.
4. Are DIY outdoor living projects budget-friendly?
Yes! Many DIY projects use inexpensive materials like pallets, cinder blocks, or upcycled items, making them budget-friendly.
5. How can I protect DIY outdoor furniture?
Use weather-resistant materials and finishes like outdoor paint, wood sealants, and covers to protect your furniture from the elements.

