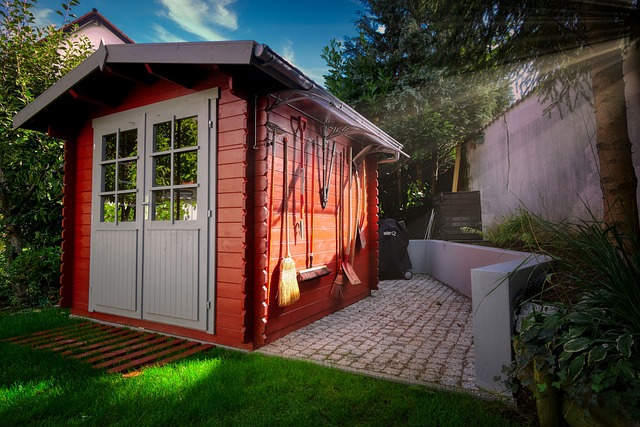
Building a DIY garden shed is a great way to create extra storage space for tools, equipment, or even a personal workspace—all while staying within a budget.
A garden shed adds value and functionality to your outdoor area, and with some clever planning, you can construct one without spending a fortune.
In this guide, we’ll explore 12 essential DIY garden shed tips to help you design, build, and customize your shed on a budget.
From material selection to space-saving hacks, these tips will ensure that your project is both affordable and efficient.
1. Plan Your Shed’s Purpose and Size.
Before starting your DIY garden shed project, it’s important to know what you’ll be using it for. Are you storing gardening tools, bikes, or setting up a workspace? Understanding the purpose will help you determine the size and layout of your shed.
Key Considerations:
- Measure your available yard space.
- Consider shelving or loft space for additional storage.
- Think about door size—will you need extra-wide doors for large equipment?
Expert Tip: According to The Spruce, it’s crucial to design your shed with future needs in mind. “Plan for the maximum amount of storage you may need down the line. It’s easier to build a larger shed now than to expand later” (The Spruce).
2. Use Reclaimed Materials for Cost Savings
One of the best ways to save money on your DIY garden shed is by using reclaimed or recycled materials. Old pallets, leftover wood, and windows from construction sites or second-hand stores can be repurposed to build a rustic yet sturdy shed.
Materials to Reclaim:
- Pallets for walls and flooring
- Old windows for natural light
- Corrugated metal or salvaged wood for roofing
- Used doors or shutters
Expert Opinion: DIY expert Bob Vila suggests sourcing materials from demolition yards or online classifieds to reduce costs. “Reclaimed materials can drastically reduce your project’s budget while adding unique character to your shed” (Bob Vila).
3. Build a Solid Foundation
A solid foundation is key to ensuring your shed remains stable and lasts for years. However, you don’t need to invest in an expensive concrete slab—gravel or pressure-treated wood can serve as an affordable alternative.
Foundation Options:
- Gravel Foundation: Lay a bed of gravel and use concrete blocks or wooden beams to level and support your shed.
- Wood Foundation: Pressure-treated wood beams can serve as a sturdy base for smaller sheds, saving you time and money.
Expert Tip: According to Family Handyman, a gravel base is an excellent choice for sheds as it offers good drainage and prevents water from pooling under the structure (Family Handyman).
4. Opt for Simple Shed Designs
Choosing a simple shed design can save you both time and money. Complex rooflines and fancy architectural features are nice, but they can significantly increase your budget. Instead, opt for a basic design with a gable or flat roof.
Simple Design Elements:
- Single-door entry
- Basic sloped roof or gable design
- Minimal windows to reduce framing costs
- Utilize open shelving instead of enclosed cabinets for storage
Expert Opinion: Architectural Digest recommends sticking to simple structures to keep labor and material costs down. “Basic sheds can be just as functional without all the bells and whistles. Focus on utility rather than aesthetics” (Architectural Digest).
5. DIY the Framing to Save on Labor Costs
Framing is one of the more labor-intensive parts of building a shed, but it’s also an area where you can save a significant amount of money by doing it yourself. Learn the basics of framing and layout your walls before starting.
Basic Framing Tips:
- Use 2×4 lumber for the wall studs.
- Frame the shed’s floor with pressure-treated lumber.
- Construct each wall separately before attaching them to the foundation.
Expert Tip: Lowe’s provides detailed tutorials on framing and DIY shed construction. “Framing can be intimidating for beginners, but with the right tools and instructions, it’s entirely doable” (Lowe’s).
6. Pre-Built Shed Kits Can Be a Budget-Friendly Option
If you want to streamline the process and reduce time spent on complex construction, consider buying a pre-built shed kit. These kits come with all the necessary materials pre-cut and ready for assembly, making them an excellent budget-friendly option.
Benefits of Pre-Built Kits:
- No need to cut or measure materials.
- Includes all screws, bolts, and fasteners.
- Comes with step-by-step instructions.
Expert Opinion: ShedBuilder Magazine suggests pre-built kits are a great option for beginners. “Kits take the guesswork out of shed building and are often cheaper than buying all the materials separately” (ShedBuilder Magazine).
7. Install a Sloped Roof for Easy Water Drainage.
A shed with a sloped roof is not only easier to construct but also helps with water drainage, preventing damage from standing water or leaks. The simplest shed roof to build is a single-pitch, also known as a “shed roof.”
Benefits of a Sloped Roof: 
- Easier to construct than complex rooflines.
- Provides natural water drainage.
- Less expensive materials needed for roof framing.
Expert Tip: According to This Old House, “A simple sloped roof design can save you materials and keep the build process straightforward” (This Old House).
8. Use Corrugated Metal for the Roof
If you’re looking for a durable, budget-friendly roofing material, consider corrugated metal. It’s relatively inexpensive, lightweight, and easy to install—perfect for a DIY garden shed. It also provides excellent protection against rain and snow.
Why Choose Corrugated Metal:
- Affordable and long-lasting.
- Weather-resistant.
- Easy to install with basic tools.
Expert Opinion: Home Depot highlights corrugated metal as one of the most cost-effective roofing options for sheds. “It’s durable and provides excellent protection from the elements, all at a reasonable price” (Home Depot).
9. Maximize Storage with Shelves and Hooks
To make the most out of your DIY garden shed, incorporate smart storage solutions such as shelves, hooks, and pegboards. This will help you keep your tools and supplies organized without adding extra square footage.
Space-Saving Storage Ideas:
- Install wall-mounted shelves for garden tools.
- Use hooks for hanging rakes, shovels, and hoses.
- Add a pegboard for small tools and accessories.
Expert Tip: According to Better Homes & Gardens, “Vertical storage can help you keep your shed clutter-free and maximize your available space” (Better Homes & Gardens).
10. Incorporate Reclaimed Windows for Natural Light
Adding windows to your shed not only enhances the look but also allows natural light to flow inside, making it easier to work without relying on electricity. Instead of purchasing new windows, consider using reclaimed or second-hand ones.
Benefits of Reclaimed Windows:
- Save money compared to new windows.
- Adds character and a rustic touch to the shed.
- Increases ventilation and natural light.
Expert Opinion: Green Building Elements advocates for using reclaimed materials like windows to lower construction costs and reduce environmental impact (Green Building Elements).
11. Install a Simple Ramp for Accessibility
If you plan to store heavy equipment or lawnmowers in your shed, a simple wooden ramp can make access easier. It’s a relatively inexpensive addition that can make a big difference in functionality.
Ramp-Building Tips:
- Use pressure-treated lumber for durability.
- Ensure the ramp is wide enough for large equipment.
- Build with a gentle slope for easy access.
Expert Tip: According to DIY Shed Plans, “Adding a ramp makes your shed more functional, especially for moving in and out large tools like wheelbarrows or lawnmowers” (DIY Shed Plans).
12. Paint or Stain for Added Protection
Once your DIY garden shed is built, it’s essential to protect it from the elements. A fresh coat of paint or stain not only enhances the appearance of your shed but also adds an extra layer of protection against moisture, UV rays, and rot.
Painting Tips:
- Use weatherproof outdoor paint or stain.
- Choose colors that match your garden or home’s exterior.
- Apply a primer if painting bare wood for better adhesion.
Expert Opinion: According to Behr Paint, “A high-quality outdoor paint or stain can add years to the life of your garden shed, protecting it from the elements” (Behr Paint).
Conclusion
Building a DIY garden shed on a budget is entirely achievable with the right materials, planning, and creativity. By using reclaimed materials, opting for simple designs, and incorporating cost-saving hacks like vertical storage and reclaimed windows, you can create a functional and stylish shed without overspending.
FAQs
1. How much does it cost to build a DIY garden shed?
The cost of building a DIY garden shed can range from $200 to $2,000, depending on the size, materials, and whether you use reclaimed items.
2. What is the easiest type of shed to build?
A simple gable or sloped-roof shed with basic framing is the easiest type of shed to build, especially for beginners.
3. Can I use pallets to build a garden shed?
Yes! Pallets are a great low-cost material that can be repurposed to create walls and floors for your garden shed.
4. What foundation should I use for my shed?
A gravel foundation or pressure-treated wood beams are cost-effective and easy-to-install foundations for small sheds.
5. How do I maintain my garden shed?
To maintain your garden shed, ensure proper ventilation, check for leaks or damage annually, and apply paint or stain every few years to protect it from the elements.

