Introduction
DIY temporary tattoos are a fun and creative way to express your personal style without the long-term commitment of a real tattoo.
Whether you’re looking to try out a design before getting inked or just want a fun accessory for an event, temporary tattoos are easy to make at home.
They are perfect for parties, festivals, or simply adding a unique touch to your everyday look. The best part? You can customize them however you want!
In this guide, we’ll walk you through 7 easy DIY temporary tattoos that you can create at home using materials you probably already have.
1. DIY Sharpie Temporary Tattoos.
Using a Sharpie temporary tattoo is one of the easiest ways to create a design on your skin. Sharpie markers come in a variety of colors, so you can customize your tattoo to suit any occasion.
Step-by-Step Guide:
- Draw Your Design: Use a fine-point Sharpie to draw your desired tattoo design on clean, dry skin.
- Seal the Tattoo: Apply a light layer of hairspray or setting spray to seal the design and make it last longer.
- Let It Dry: Wait a few minutes for the spray to dry before touching the tattoo.
Expert Tip: Cosmopolitan recommends cleaning the skin with rubbing alcohol before applying the Sharpie tattoo for better adherence and longevity (source).
2. DIY Watercolor Temporary Tattoos.
For a more artistic look, try watercolor temporary tattoos. These tattoos give a soft, painterly effect, perfect for those who love creative, abstract designs.
Step-by-Step Guide: 
- Prepare the Tattoo Paper: Purchase temporary tattoo paper, which is available at craft stores or online.
- Paint Your Design: Use watercolor paints to create your design on the paper.
- Cut and Apply: Once the paint is dry, cut out the design, peel off the backing, and press the tattoo onto your skin with a damp cloth.
Expert Tip: Crafts expert Sarah Hearts suggests using pastel colors to achieve a true watercolor effect on your skin (source).
3. DIY Henna Tattoos.
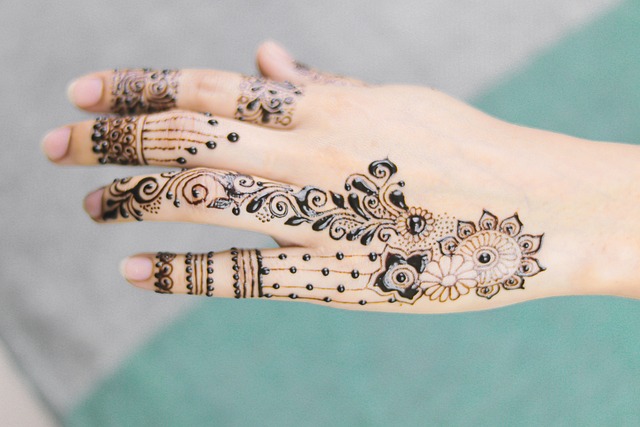
Henna tattoos are a natural and longer-lasting option for those who want a semi-permanent design. Henna is made from plant-based dye and can last up to two weeks, depending on how well you take care of it.
Step-by-Step Guide:
- Mix the Henna Paste: You can buy pre-made henna paste or make your own by mixing henna powder with water and essential oils.
- Apply the Design: Use a fine-tip applicator or a cone to draw intricate designs on your skin.
- Let It Set: Allow the henna to dry for a few hours. The longer it sets, the darker the tattoo will be.
Expert Opinion: Henna artist Henna Caravan recommends keeping the henna paste on your skin for at least 4 hours to get a deep, rich color (source).
4. DIY Perfume Tattoo.
Perfume tattoos are a clever way to create a temporary design that looks subtle but smells amazing. Using your favorite fragrance, you can create a tattoo that is both visual and aromatic.
Step-by-Step Guide:
- Choose a Design: Print or draw your tattoo design on regular paper.
- Apply Perfume: Spray perfume generously onto the area of skin where you want the tattoo.
- Transfer the Design: Press the paper onto your skin and hold for about 30 seconds. Gently peel the paper off to reveal your design.
Expert Tip: According to DIY Fashion Accessories blogger Erica Domesek, perfume tattoos are great for short-term wear at events or parties (source).
5. DIY Glitter Temporary Tattoos.
For those who love sparkle, glitter temporary tattoos are a fun way to add shine to your look. These are perfect for festivals, parties, or when you just want to stand out.
Step-by-Step Guide:
- Apply Stencil or Freehand: Use a stencil or freehand draw a design with body-safe glue.
- Add Glitter: Sprinkle glitter onto the glue while it’s still wet, covering the entire design.
- Let It Dry: Wait for the glue to dry, then gently brush off excess glitter for a neat, clean tattoo.
Expert Opinion: Allure suggests using cosmetic-grade glitter to avoid irritation and keep the tattoo safe for your skin (source).
6. DIY Tattoo with Eyeliner.
An eyeliner tattoo is quick, easy, and perfect for trying out simple designs. With just an eyeliner pencil, you can create a temporary tattoo that lasts for a few hours.
Step-by-Step Guide: 
- Choose an Eyeliner: Use waterproof eyeliner for longer-lasting results.
- Draw Your Design: Sketch the tattoo design directly onto your skin.
- Seal the Tattoo: Use a makeup setting spray or hairspray to seal the design and prevent smudging.
Expert Tip: Beauty expert Huda Kattan recommends using liquid eyeliner for more detailed and precise designs (source).
7. DIY Tattoo Using Printable Tattoo Paper.
If you’re looking for a detailed or intricate design, printable tattoo paper is a great option. You can print any image or design onto this special paper and transfer it to your skin.
Step-by-Step Guide:
- Print Your Design: Use an inkjet printer to print your chosen design onto temporary tattoo paper.
- Cut and Peel: Cut around the design and peel off the backing.
- Apply the Tattoo: Press the tattoo onto your skin with a damp cloth for 30 seconds, then peel off the paper to reveal your custom tattoo.
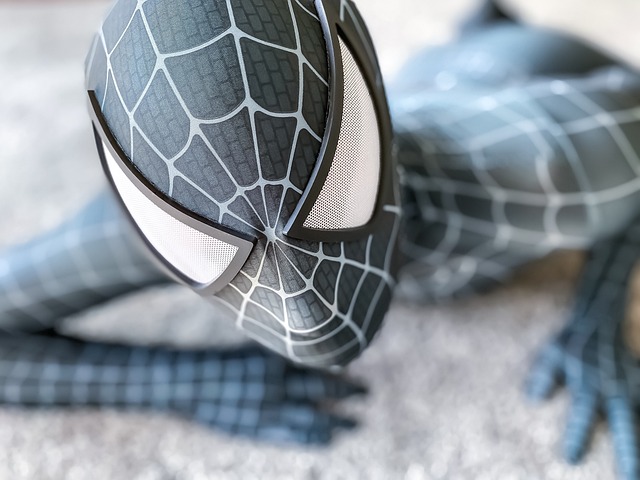
Expert Opinion: DIY superhero costume enthusiast Amber Kemp-Gerstel suggests using printable tattoos as part of a costume to create fun, themed designs (source).
Conclusion:
By experimenting with these DIY temporary tattoos, you can easily customize your look for any occasion.
Whether you’re crafting a bold design for a party or a subtle tattoo for everyday wear, these techniques offer a creative outlet that lets you express your individuality.
Plus, they pair perfectly with other DIY fashion accessories like DIY hair accessories or a DIY corsage wristlet, helping you complete any look with a personal touch.


