Introduction
Building a DIY wood box is one of the most rewarding and versatile woodworking projects you can tackle on a weekend.
Whether you’re a seasoned woodworker or a beginner, crafting your wood boxes allows you to create something functional and beautiful while improving your skills.
Wood boxes come in countless shapes, sizes, and purposes, from storage solutions to decorative accents.
In this guide, we’ll explore 7 creative DIY wood box designs you can build in just a weekend, with detailed explanations, pro tips, and expert insights to ensure you get professional results.
Whether you’re looking for a rustic storage solution or a chic decor piece, there’s a design here for everyone.
7 Creative DIY Wood Box Designs You Can Build in a Weekend.
1. Simple Storage Box for Home Organization.
A simple storage box is one of the most accessible and practical wood box projects. Perfect for keeping your home organized, this box can be customized for toys, books, or even as an entryway organizer.
Steps to Build
- Choose sturdy wood, such as pine or plywood, for durability.
- Cut the wood into six panels – four sides, a bottom, and a lid (if desired).
- Assemble the sides using wood glue and nails, ensuring the edges are square.
- Sand the surfaces smooth and finish with paint or stain to match your decor.
Pro Tip
Add small casters to the bottom of the box for portability, making it ideal for moving items between rooms.
Expert Opinion: “A simple storage box is a foundational woodworking project. Beginners should focus on precise measurements and square corners to ensure the box fits together seamlessly,” advises Steve Ramsey, a seasoned woodworking educator.
2. Rustic Crate for Farmhouse Decor.
 Rustic crates are incredibly popular for farmhouse-style decor. They’re functional and lend a charming vintage vibe to any space.
How to Create a Rustic Crate
- Use reclaimed wood or distressed new wood with sandpaper for a weathered look.
- Cut the wood into slats and arrange them to form the box. Leave small gaps between the slats for an authentic crate appearance.
- Attach the slats to a wooden frame using screws.
- Add handles or rope to the sides for easy carrying.
Pro Tip
Use a dark wood stain and stencils to add lettering or designs, such as “Fruits & Veggies” or “Storage Crate.”
3. DIY Memory Box for Keepsakes.
A DIY wood box for keepsakes is a thoughtful and personalized way to store mementos like photos, letters, and tiny treasures. These boxes make excellent gifts, especially when paired with sentimental items.
Steps to Build
- Use fine-grain wood like cherry or walnut for an elegant finish.
- Create a hinged lid using brass hardware for a polished look.
- Sand the wood perfectly and apply a clear varnish to enhance its natural beauty.
Pro Tip
Engrave a name or date onto the lid using a wood-burning tool or stencil for a personal touch.
Related Idea: Pair your memory box with handcrafted DIY birthday cards for a unique, heartfelt gift.
4. Wooden Planter Box for Indoor and Outdoor Use.
Wooden planter boxes are perfect for adding greenery to your home or garden. They can be customized to fit your space and style.
How to Build a Planter Box
- Select rot-resistant wood like cedar or redwood for outdoor use.
- Build a rectangular frame with a depth suited to the plants you’ll grow.
- Drill small holes in the bottom for drainage.
- Sand the edges and finish with an outdoor wood sealer to protect against the elements.
Pro Tip
Line the inside with landscape fabric before adding soil to prevent rot and extend the life of the box.
Expert Opinion: “Planter boxes are great beginner projects. They combine form and function while teaching you to work with wood in outdoor conditions,” says Ana White, a DIY woodworking expert.
5. Decorative Wood Box with Inlay Design.
For those seeking a more artistic challenge, a decorative wood box with inlay designs is a great project. These boxes can be jewelry holders, trinket boxes, or even statement decor pieces.
Steps to Create
- Choose contrasting wood types (e.g., maple and walnut) for the box and inlay design.
- Cut and assemble the box panels, leaving the top flat for the inlay.
- Use a router to carve out your inlay design and fit the contrasting wood pieces into the grooves.
- Sand the entire box smooth and finish with a clear coat.
Pro Tip
Start with simple geometric patterns for inlays before attempting more intricate designs.
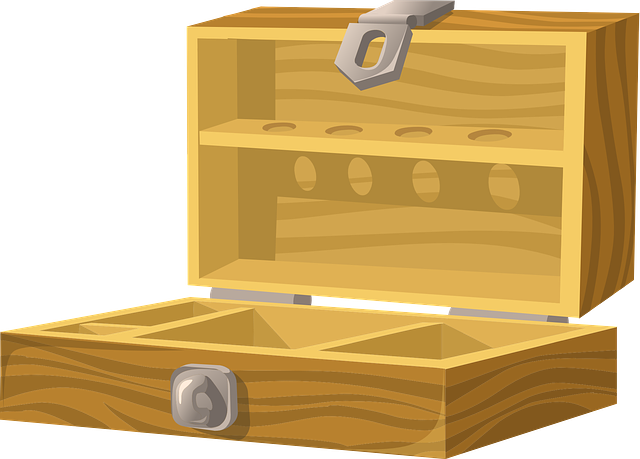
6. DIY Tool Box for Workshop Organization.
A DIY wood box for tools is a practical addition to any workshop. This sturdy project keeps your tools organized and accessible.
How to Build
- Use plywood or hardwood for strength.
- Create a rectangular box with dividers inside to separate tools.
- Attach a wooden dowel as a handle for easy carrying.
- Apply a durable finish to protect the wood from wear and tear.
Pro Tip
Include a sliding drawer or removable tray for smaller tools like screws and nails.
Related Project: Organize your workshop further by creating holiday-themed crafts like a DIY candy cane decoration for added festive charm.
7. Shadow Box for Wall Displays.
A shadow box is a unique way to display collectibles, art, or photos. These boxes can be hung on the wall or placed on a tabletop.
Steps to Build a Shadow Box
- Cut four pieces of wood to form the frame and a solid panel for the back.
- Assemble the frame and attach the back panel using nails or screws.
- Add a glass or acrylic front panel with hinges if you want it to open.
Pro Tip
Paint the interior a contrasting color to highlight the items you display.
Expert Opinion: “Shadow boxes allow for creativity and personalization. They’re an excellent project for showcasing small items that hold big memories,” says Bob Vila, a trusted authority in home improvement and DIY projects.
Tools and Materials You’ll Need.
For all the projects above, you’ll need some essential woodworking tools and materials:
- Tools: Saw, drill, sander, clamps, measuring tape, wood glue, nails, or screws.
- Materials: Wood (pine, plywood, cedar, etc.), sandpaper, wood stain or paint, finishing coat.
Why Build a DIY Wood Box?
- Cost-Effective: DIY projects save Money compared to buying pre-made boxes.
- Customizable: You can design boxes to fit your needs, whether for storage, decor, or gifting.
- Skill-Building: Each project helps improve your woodworking skills.
Conclusion
Building a DIY wood box is more than just a weekend project; it’s an opportunity to create something functional and beautiful while enhancing your skills.
The possibilities are endless, from rustic crates and elegant memory boxes to practical planter boxes and artistic inlay designs.
Take your woodworking journey to the next level by experimenting with these ideas, and remember to incorporate personal touches to make each project uniquely yours.
Expert Advice: “Start with simple designs and gradually move to complex ones. Always measure twice and cut once for accuracy,” recommends Steve Ramsey.
Whether you’re crafting for your home or as a gift, these wood box projects will leave you with a sense of accomplishment and a stunning piece to show off. Now, grab your tools and start building!
FAQs About DIY Wood Boxes
- What is the most straightforward DIY wood box to build? A simple storage box is the easiest to build, requiring only essential tools and straightforward assembly.
- What type of wood is best for DIY wood boxes?
- Pine, plywood, and cedar are great choices. Cedar is perfect for outdoor boxes due to its moisture resistance.
- How can I make my DIY wood box last longer?
- Sand the wood, seal it with a protective finish, and, for outdoor boxes, use a waterproof sealant.
- Do I need advanced tools to build a DIY wood box?
- Most projects require essential tools like a saw, drill, and sandpaper. Complex designs may need specialized tools like a router.
- Can I make a DIY wood box without nails or screws?
- You can use strong wood glue or create interlocking joints for a secure assembly.
- How long does it take to build a DIY wood box?
- Most designs can be completed in a weekend, with more straightforward boxes taking just a few hours.

